Tee Adapter AAV Assembly Kit Installation: A Step-by-Step Guide
Schedule a tee adapter AAV assembly kit installation with our step-by-step guide. Learn code-compliant placement and common mistakes to avoid.
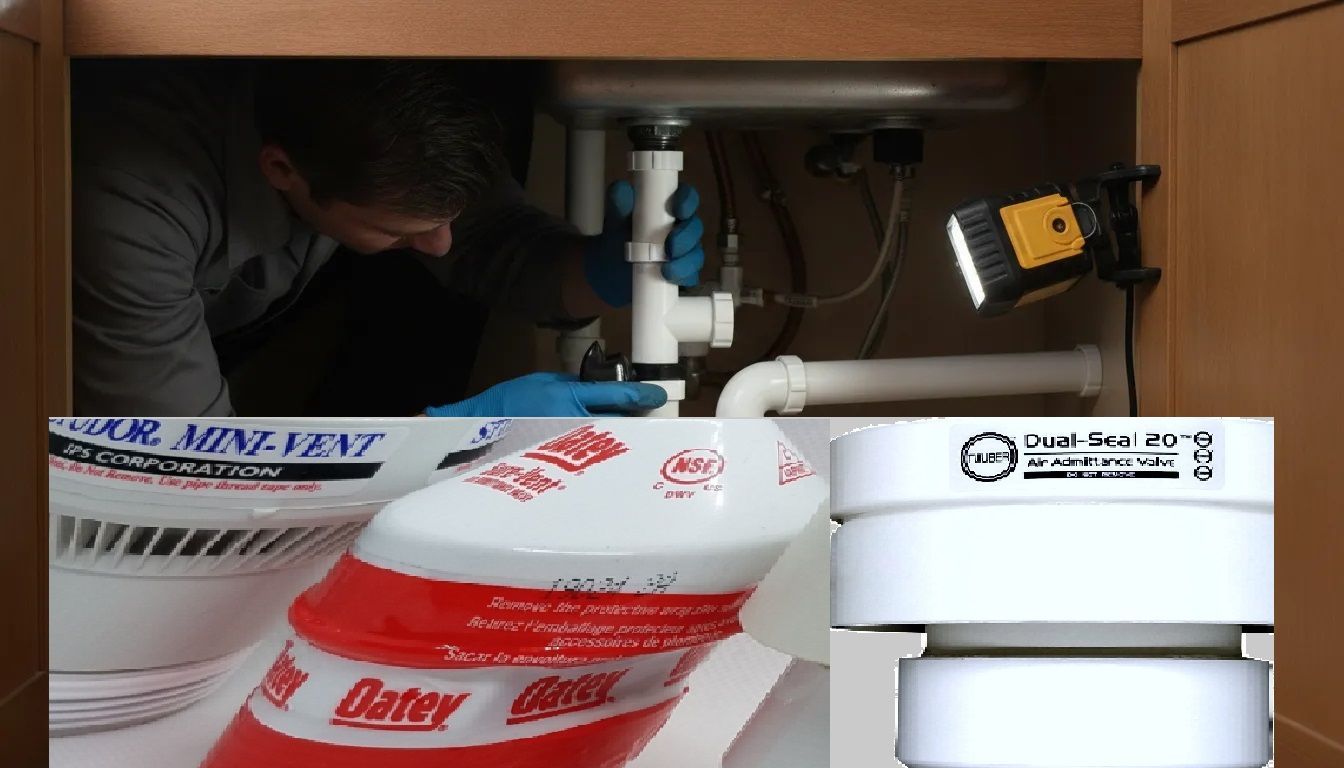
Venting a sink becomes difficult when the drain is boxed into a tight cabinet. Isolated in a kitchen island, or added during a retrofit where a new vent stack is impractical. A tee adapter with an air admittance valve (AAV) can create a compact branch-venting connection while keeping the valve accessible for inspection and service.
Ready to find the right tee adapter AAV assembly kit for your project? Browse Tuuber's pre-assembled venting solutions designed for restricted-access plumbing configurations.
Tee adapter aav assembly kit installation connects the fixture drain to an AAV through a preconfigured branch-venting fitting. Allowing air to enter the DWV system when negative pressure develops. That pressure balance helps protect the trap seal from siphonage and reduces the risk of sewer gases entering the living space, provided the installation follows applicable plumbing requirements.
The details matter in restricted spaces, especially valve height, orientation, access, and final system testing. Before cutting pipe, review these fundamentals and the broader AAV installation how-to guides to understand where this assembly fits within a compliant venting plan.
What Is a Tee Adapter with AAV Assembly Kit and When Do You Need One?
A tee adapter with AAV assembly kit combines a tee fitting and an air admittance valve in a pre-assembled venting component. The tee connects to the fixture drain or branch drain while the integrated AAV provides a controlled path for air to enter the drainage system when negative pressure develops. This helps balance pressure and reduce the risk of trap siphonage, which can allow sewer gases to enter a building. The International Code Council explains how AAVs balance drainage pressure.
A tee adapter AAV kit is a pre-assembled venting component that connects the fixture drain to an air admittance valve through a compact branch-venting fitting. It is most useful in restricted-access plumbing scenarios where running a conventional vent stack is impractical, such as island sinks, remodeled kitchens, and retrofit bathroom additions.
For a broader overview of planning and installing different AAV configurations, see Air Admittance Valve Installation: How-To Guides for Every Application. A tee adapter assembly is one practical option within that larger installation process.
What the assembly does
The tee adapter creates a branch vent connection without requiring a separate sanitary tee, loose fittings, and an independently mounted valve. Tuuber's dual-seal AAV technology supports branch venting applications with NPT-threaded connections, giving installers a compact connection point in areas where access is limited. The pre-assembled format can also reduce the number of individual connections that must be measured, aligned, and checked during installation.
Tee adapters with AAVs are particularly useful in tight plumbing applications where running a full vent stack would be difficult or costly. The fitting does not replace the need to follow the applicable plumbing code or the requirements for an open vent in the drainage system. An AAV admits air to relieve negative pressure, but it does not relieve positive pressure. Have the complete DWV layout reviewed for the applicable North American code requirements before installation.
When a tee adapter kit makes sense
Island sinks: A kitchen island may have no practical route for a conventional vent stack through nearby walls or cabinets.
Remodeled kitchens: A new sink location can make traditional vent routing disruptive, especially when finished walls and floors are already in place.
Laundry rooms: A compact branch vent can help organize a drain connection where utility-room space is limited.
Added bathrooms: In a retrofit, the existing structure may leave little room for new vent piping.
Under-sink installations: A pre-assembled tee and AAV can simplify work inside a crowded cabinet, provided the valve remains accessible and is installed at the required height.
Individual and branch AAVs generally need to be positioned at least 4 inches above the horizontal branch drain or fixture drain they serve. Confirm the measurement, orientation, access, and local code requirements before cutting pipe. The AAV code compliance guide can help verify the permitted arrangements in your jurisdiction. The right kit is not simply the smallest option; it is the assembly that fits the available space while preserving proper drainage, venting, and future service access.
Where to Use a Tee Adapter AAV Kit: Restricted-Access and Branch Venting Scenarios
A tee adapter AAV kit is most useful where a fixture or branch drain needs venting. But routing a conventional vent through walls, ceilings, or the roof would be impractical. Typical applications include a remodeled kitchen, an island sink, an added bathroom fixture, or another restricted-access plumbing configuration. The installation still must follow the plumbing code adopted by the authority having jurisdiction.
Tee adapter AAV kits are designed for branch venting and individual fixture venting in restricted-access plumbing scenarios. They connect directly to the horizontal drain branch and provide a dedicated connection point for the AAV. Making them well suited for kitchen islands, remodeled bathrooms, and other retrofit plumbing applications.
Branch vents and individual fixture vents
Under the applicable North American plumbing requirements, AAVs may be used on individual vents and branch vents in place of vent piping that terminates outside the building. A tee adapter assembly is suited to this work because it connects directly to the horizontal drain branch while providing a dedicated connection point for the valve. The AAV admits air when negative pressure develops, helping balance the drainage system and reduce the risk of trap siphonage. The fixture trap must remain properly protected, and the valve must remain accessible for inspection or replacement. For a broader review of permitted arrangements, see AAV code compliance standards.
Circuit vents and stack vent applications
AAVs may also be permitted on circuit vents and, where the code allows it, on stack vents or vent stacks. Stack applications have different requirements from individual or branch installations, including the type of valve and the fixtures or branch intervals served. Do not assume that a tee adapter kit is suitable for every stack arrangement. Review the system design and local requirements before selecting the assembly. The code guidance also includes limitations for larger drainage stacks and other special configurations.
Height and positive-pressure requirements
For an individual or branch-type AAV, locate the valve at least 4 inches (102 mm) above the horizontal branch drain or fixture drain it serves. This minimum clearance is a functional installation requirement, not a convenient rule of thumb. Measure from the drain to the valve location before cutting or solvent-welding the piping.
An AAV admits air but does not relieve positive pressure. At least one vent pipe in the drainage system must still extend outdoors to provide positive-pressure relief. An AAV without an engineered design must not be used to vent a sump or tank. When the layout falls outside an individual, branch, circuit, or permitted stack-vent application, consult a qualified plumbing designer and the local authority. For restricted layouts, review installing AAVs in restricted plumbing configurations before proceeding.
Step-by-Step: Installing the Tee Adapter with AAV Assembly Kit Under a Sink
Before starting, gather a hacksaw or pipe cutter, measuring tape, fine-grit sandpaper, and a clean cloth. For PVC connections, also have compatible primer and cement. For an NPT-threaded connection, use Teflon tape approved for the application. Keep the assembly accessible for inspection and service, and follow the valve manufacturer's instructions throughout the work.
A tee adapter AAV assembly kit installation under a sink follows six steps: confirm local code compliance. Measure the mounting position, cut and prepare the pipe, attach the tee adapter, install the AAV vertically, and test the DWV system. Each step is detailed below with the specific measurements and techniques required for a code-compliant installation.
Confirm local code compliance
Verify that an air admittance valve is permitted for this fixture and branch-vent application in your jurisdiction. Local requirements can control the type of valve, connection method, access, and relationship to the building's vent system. An AAV admits air to balance negative pressure and help prevent trap siphonage, but it does not relieve positive pressure. Plumbing codes therefore generally still require at least one vent pipe to extend outdoors. If the installation is part of a remodel or a new branch, confirm the complete DWV layout before cutting any pipe.
Measure the mounting position
Use the measuring tape to locate the tee adapter so the AAV will be at least 4 inches (102 mm) above the horizontal branch drain or fixture drain it serves. Mark the pipe at the planned cut points, allowing enough room for the tee body, insertion depth, and any required fittings. This clearance is a code-based minimum for individual and branch-type AAVs. Check that the finished valve will remain accessible under the sink and will not be blocked by the cabinet, stored items, or insulation.
Cut and prepare the pipe
Cut the pipe squarely with a pipe cutter or hacksaw. Remove burrs from the inside and outside edges, then lightly sand the pipe ends until they are smooth and clean. Wipe away dust and dry-fit the components before applying any joining compound. A clean, square cut helps the tee adapter seat fully and reduces the chance of a leaking or misaligned connection.
Attach the tee adapter
For a solvent-weld connection, apply the compatible primer and cement according to the product directions. Push the pipe fully into the tee adapter with a slight twisting motion, then hold it in position while the joint sets. For an NPT-threaded connection. Wrap the male threads with Teflon tape in the tightening direction and thread the fitting together by hand before snugging it with a suitable wrench. Do not overtighten or use tape where the manufacturer's instructions prohibit it. Remove excess cement or tape from the opening.
Install the AAV vertically
Attach the AAV to the tee assembly and position it within 15 degrees of plumb. The valve must remain upright so its internal mechanism can operate properly. Confirm that the air inlet is unobstructed and that the valve is not enclosed in an airtight box. Some tee adapter kits are rated for installation in temperatures from -40 to 150 degrees F. But verify the rating for the specific product and avoid locations outside that range. For more on proper placement and clearances, see the standard AAV installation steps.
Test the DWV system before finalizing
Complete the required drainage, waste, and vent system testing before installing the final AAV cap or treating the installation as complete. Inspect every joint for movement or leakage, run water through the fixture, and confirm that the trap retains its seal and the drain flows normally. AAVs should be installed after required DWV testing has been performed.
How the Tee Adapter Kit Differs from a Standalone AAV Installation
The main difference in a tee adapter AAV assembly kit installation is how many separate components must be selected, aligned, and sealed in the field. A standalone AAV is a valve body installed into a separately assembled branch. A tee adapter kit combines the adapter and AAV connection into a pre-assembled configuration, which can simplify work where cabinet space or pipe access is limited.
A tee adapter AAV kit differs from a standalone AAV installation primarily in component count and assembly complexity. The kit arrives pre-assembled with fewer field connections, making it easier to position in tight spaces. While a standalone AAV requires separate purchase and assembly of a sanitary tee, pipe section, fittings, and valve body.
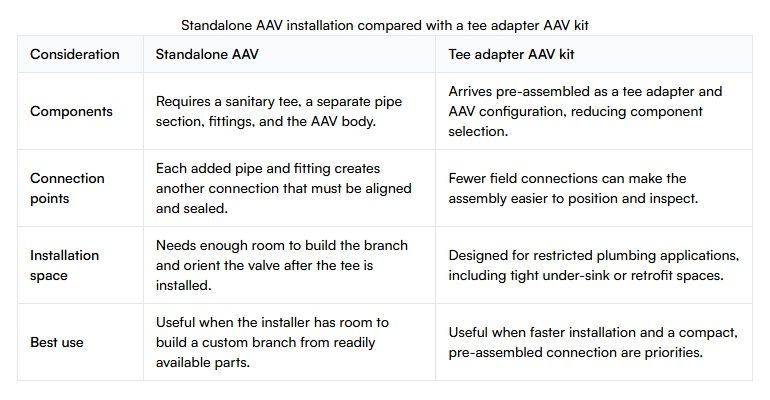
Standalone AAV installation compared with a tee adapter AAV kitConsiderationStandalone AAVTee adapter AAV kitComponentsRequires a sanitary tee, a separate pipe section, fittings, and the AAV body.Arrives pre-assembled as a tee adapter and AAV configuration, reducing component selection.Connection pointsEach added pipe and fitting creates another connection that must be aligned and sealed.Fewer field connections can make the assembly easier to position and inspect.Installation spaceNeeds enough room to build the branch and orient the valve after the tee is installed.Designed for restricted plumbing applications, including tight under-sink or retrofit spaces.Best useUseful when the installer has room to build a custom branch from readily available parts.Useful when faster installation and a compact, pre-assembled connection are priorities.
Why fewer connections matter in a tight cabinet
A standalone arrangement can work reliably, but it demands careful measurement and fitting selection. In a crowded cabinet, the installer may have little room to cut pipe, rotate a sanitary tee, or tighten threaded components without disturbing the drain. Tee adapters with AAVs are specifically useful in tight applications where a conventional vent arrangement is difficult or costly. The pre-assembled format helps reduce the number of decisions made inside that limited work area.
The kit does not remove installation requirements. The AAV still needs to remain accessible, be installed within 15 degrees of vertical, and meet the applicable height and local code requirements. Individual and branch-type AAVs must comply with ASSE 1051, while stack-type AAVs must comply with ASSE 1050. Confirm which application and standard apply before installation.
Component simplicity does not replace valve performance
Tuuber's patented dual-seal design uses triple flow passages and activates at -0.01 psi of negative pressure. That design helps the valve admit air when drainage flow creates negative pressure while maintaining protection against trap siphonage. Review Tuuber's dual-seal AAV technology alongside the installation layout so the compact kit is selected for both access and performance, not just convenience.
For any configuration, follow the product instructions, maintain access for inspection or replacement, and verify that the completed DWV system meets the requirements of the jurisdiction.
Common Mistakes and Troubleshooting for Tee Adapter AAV Installations
Most problems with a tee adapter AAV assembly kit installation come from placement, orientation, or completing the steps in the wrong order. Check these points before closing the wall, cabinet, or attic access.
The most common mistakes in tee adapter AAV installations include installing the valve too low or at the wrong angle. Installing the AAV before DWV system testing, using harsh cleaners near the valve, and using an AAV for a sump or tank without an engineered design. Each issue has a specific correction and prevention method.
Installing the valve too low or at the wrong angle
An individual or branch AAV must be at least 4 inches (102 mm) above the horizontal branch drain or fixture drain it serves. If the valve is installed lower, it may not meet the applicable installation requirement. Confirm the measurement from the top of the horizontal drain before cutting or solvent-welding the assembly. The height requirement is summarized in the air admittance valve provisions.
The AAV should also remain within 15 degrees of vertical. A tee adapter that is visibly leaning can interfere with the valve's intended operation. Recheck the pipe alignment before the solvent cement or threaded connection sets. Do not force the valve into position by bending the branch piping.
Installing the AAV before testing the DWV system
Complete the required drainage, waste, and vent system testing before installing the AAV. The valve should not be exposed to pressure-testing procedures or construction debris when it is not yet needed. The applicable guidance states that AAVs are installed after the required DWV testing has been performed. If the valve was installed early, follow the product and local inspection requirements before treating the installation as complete.
Using cleaners or overlooking attic clearance
Do not apply chemical cleaners, solvents, or other harsh products to the AAV. And do not use them near the valve in a way that could expose its seals. Tuuber's product guidance warns that using cleaners or chemicals on or near the AAV can void the warranty. Keep the valve clean through normal installation practices instead of trying to wash or lubricate its operating parts.
For attic installations, maintain at least 6 inches of clearance above insulation. This requirement helps keep the valve accessible and prevents insulation from obstructing the assembly. If the valve cannot meet the clearance or remains buried after insulation is installed, revise the layout before completing the work. For more on confined-space venting, see installing AAVs in restricted plumbing configurations.
Using an AAV for a sump or tank
Do not use an AAV to vent a sump or tank unless the installation has an engineered design. The International Code Council guidance states that an AAV without an engineered design must not be used for sumps or tanks of any type. A tee adapter kit is intended for appropriate fixture, individual, or branch venting applications, not as a universal substitute for engineered tank or sump ventilation.
Frequently Asked Questions
Can I use a tee adapter AAV kit for a kitchen island sink?
In many jurisdictions, a tee adapter with an air admittance valve can support an individual or branch vent where traditional vent piping is impractical, including restricted-access island-sink configurations. Confirm the permitted arrangement with the applicable IPC, IRC, or UPC requirements and the local authority having jurisdiction before installation. AAVs admit air to balance negative pressure and help prevent trap siphonage, but they do not relieve positive pressure. At least one vent in the drainage system must still extend outdoors. ICC guidance explains these requirements.
How high should the AAV be above the drain?
Install an individual or branch AAV at least 4 inches above the horizontal branch drain or fixture drain it serves. Keep the valve accessible for inspection or replacement, inside the building envelope, and within 15 degrees of plumb. Local code may impose additional placement requirements, so measure from the correct drain before cutting pipe. The 4-inch minimum is stated in applicable AAV provisions at UpCodes.
Does a tee adapter AAV kit comply with ASSE standards?
The applicable standard depends on the valve classification and installation. Individual and branch-type AAVs must comply with ASSE 1051, while stack-type AAVs must comply with ASSE 1050. Verify the specific product documentation and local code before selecting a kit. Do not assume that an AAV intended for one application meets the requirements for another.
Can a homeowner install this assembly kit?
A capable DIYer can often complete a restricted-access installation when the plumbing layout, tools, product instructions, and local requirements are clear. The work still requires correct pipe sizing, leak-free connections, proper vertical alignment, accessibility, and DWV testing before the AAV is installed. If the configuration involves a sump, tank, unusual drainage arrangement, or unclear code requirement, consult a qualified plumbing professional or contact the manufacturer for technical guidance.
Ready to Choose the Right Tee Adapter AAV Kit?
The right assembly can simplify venting in restricted-access sink installations and help you plan the connection before cutting pipe.