Complete Trap Assembly Kit Installation Guide
Schedule your next under-sink project with the complete trap assembly kit installation guide. Step-by-step, under 30 minutes, complies with ASSE 1050/1051.
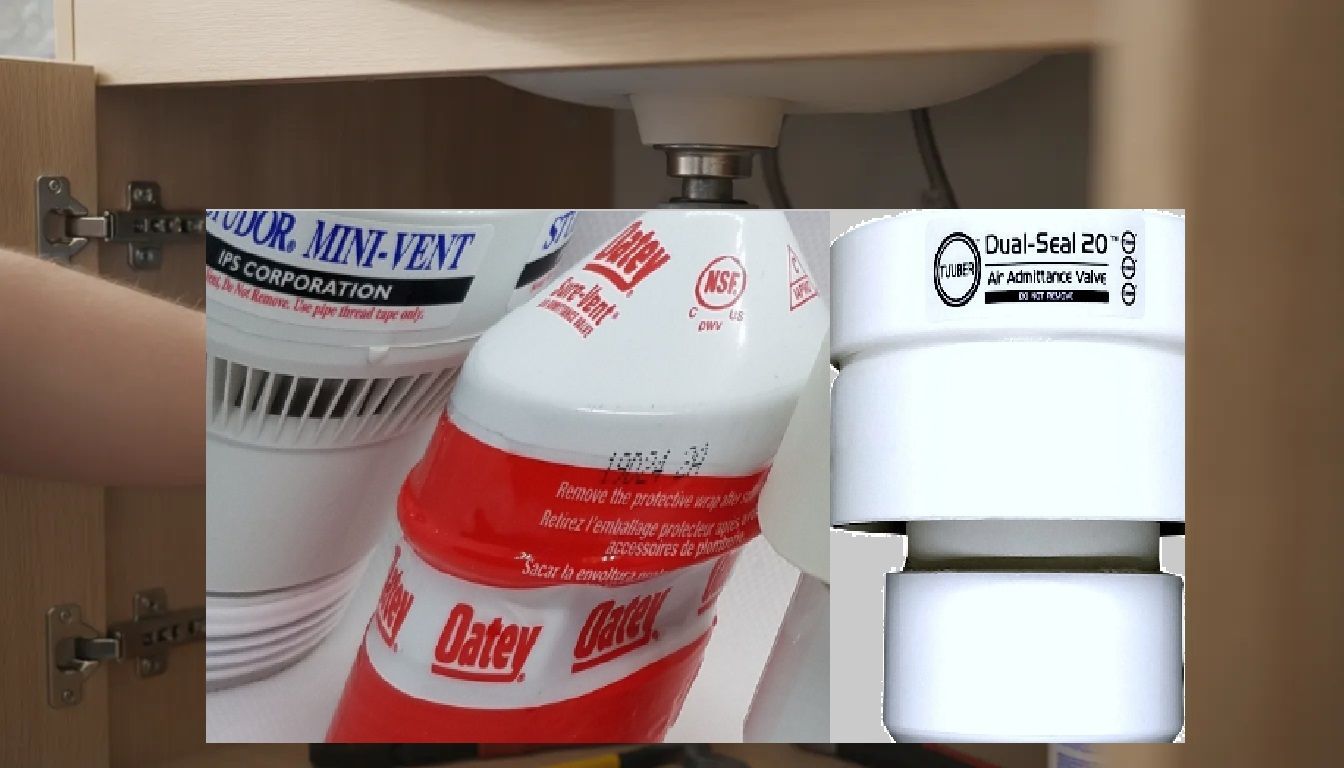
Under-sink drain work often becomes difficult when limited cabinet space, separate fittings, and an unreliable venting arrangement all have to be solved at once. A pre-assembled trap and air admittance valve can simplify the job.
Shop the Tuuber Complete Trap Assembly Kit before you begin, so the trap, air admittance valve, and connection hardware arrive together for a single under-sink project.
The complete trap assembly kit installation can typically be finished in under 30 minutes for a standard under-sink setup. Tuuber's kit combines the trap assembly with a Dual-Seal 20 AAV. The valve opens to admit air as the fixture drains, then closes to help block sewer gas and odors while protecting the trap seal from siphoning.
This guide walks through the parts, preparation, connection points, and final checks to consider for bathroom and kitchen applications. Before starting, review the applicable requirements for your jurisdiction and Tuuber's AAV code compliance guidance. The right setup begins with understanding exactly what is included and how each component fits the space.
What Comes in the Tuuber Complete Trap Assembly Kit?
Under-sink venting is easier to plan when the trap, connections, washers, and air admittance valve arrive as one coordinated package. The Tuuber Complete Trap Assembly Kit is built for 1-1/2-inch venting of an individual fixture trap, including tight-fit bathroom and kitchen sink applications. Instead of assembling a parts list from several shelves, you can install from a pre-assembled trap and the matching connection hardware.
Pre-assembled parts, ready for the installation
The kit includes the following components:
1 1-1/2-inch tubular tee with a pre-assembled P-trap.
1 extension connector.
2 1-1/2-inch x 1-1/4-inch conversion slip-joint rubber washers.
2 1-1/2-inch slip-joint rubber washers.
1 slip-joint trap nut.
1 slip-joint poly nut.
1 1-1/2-inch x 1-1/4-inch flexible connector with 2 stainless steel clamps.
1 Dual-Seal 20 air admittance valve.
The flexible connector accommodates common sink connections while the conversion washers support the change between 1-1/2-inch and 1-1/4-inch slip-joint sizes. The stainless steel clamps secure the flexible connection, and the included nuts and washers keep the assembly organized during fit-up. The Dual-Seal 20 AAV opens as the fixture drains to admit air into the drainage system, then closes to help block sewer gas. You can review how Tuuber's dual-seal technology works before beginning the installation.
Why use a complete kit instead of separate parts?
Buying each component separately can mean an extra trip for a washer, nut, connector, or correctly sized adapter. It also creates more opportunities to select mismatched parts or omit a small sealing component. A pre-assembled kit reduces that preparation and gives the installer one defined set of connections to inspect and test. That matters in a tight cabinet where disassembly is inconvenient and every additional joint is another potential failure point.
The kit is designed for quick under-sink installation, with typical installations completing in under 30 minutes when the existing drain layout is suitable. For the coordinated parts and Dual-Seal 20 AAV, see the Tuuber Complete Trap Assembly Kit.
Complete Trap Assembly Kit vs Installing Components Separately
Under-sink work often becomes slower when every fitting must be selected, measured, and hand-fitted at the fixture. A complete trap assembly kit installation gives contractors and capable DIYers a coordinated starting point, while separate components remain useful when the drain layout requires a custom configuration. The right choice depends on whether speed and repeatability or maximum flexibility matters more.
Oatey's installation guidance notes that most DIYers spend about 30 to 45 minutes installing a standard P-trap alone. Tuuber's Complete Trap Assembly Kit is designed for typical under-sink installations in under 30 minutes, with the trap and AAV supplied as one matched assembly. That difference can help a contractor finish the planned work without another supply trip. It also reduces the risk of a callback caused by a missing washer or nut.
Tuuber Complete Trap Assembly Kit compared with separate components.Consideration.Tuuber Complete Trap Assembly Kit.Trap and AAV components purchased separately.Install time.Typical installation under 30 minutes.Often 45 minutes or more when selecting, fitting, and adjusting each part.Parts count.One pre-assembled bundle with the required trap, AAV, connectors, washers, nuts, and clamps.8 or more separate fittings and components that must be matched to the drain layout.Leak risk.Factory-tight slip joints reduce the number of hand-fit connections.More hand-fit joints create more opportunities for incorrect washer or nut placement.Code compliance.The Tuuber kit complies with ASSE 1050 and ASSE 1051 standards.The installer must verify compliance for each selected part and the intended jurisdiction.Best for.Contractors and DIYers who want a repeatable, tight-fit under-sink installation.Custom configurations that require different dimensions, fittings, or routing.
The kit includes a tubular tee with a pre-assembled P-trap, an extension connector, conversion and slip-joint washers, nuts, and a flexible connector with stainless steel clamps. That parts package is especially practical for 1-1/2-inch venting at an individual fixture trap and tight bathroom or kitchen sink spaces. Review the official installation guidelines before starting, and confirm local requirements for the specific application.
Choose separate components when an unusual wall stub, multiple-bowl arrangement, or nonstandard measurement makes a bundled assembly unsuitable. For standard under-sink installations, the Tuuber kit keeps the focused on correct alignment and testing instead of sourcing every connection.
Complete Trap Assembly Kit Installation Under a Bathroom Sink
For many bathroom sink projects, a pre-assembled trap and venting kit keeps the installation focused and predictable. Tuuber's Complete Trap Assembly Kit is designed for typical under-sink installation in under 30 minutes when the existing connections are accessible and the layout is compatible. The kit brings the trap, tee, connectors, and slip-joint hardware together. The Dual-Seal 20 AAV then supplies air as the fixture drains and closes to block sewer gas. Consider the following steps:
Shut off the water supply. Close both supply valves below the sink. Open the faucet and allow the lines to drain before starting work.
Clear the cabinet. Remove stored items and place a bucket beneath the existing trap. Keep a towel nearby because residual water will remain in the drain assembly.
Remove the old trap. Loosen the slip-joint nuts by hand where possible, then remove the trap from the sink tailpiece and wall stub-out. Empty the water into the bucket and clean debris from the exposed connections.
Dry-fit the pre-assembled trap. Position the Tuuber assembly between the sink tailpiece and wall stub-out without tightening anything. Use the included 1-1/2-inch slip-joint washers and nuts to confirm that each connection seats squarely.
Connect the tailpiece and trap bend. Join the sink tailpiece to the trap bend, adjusting the assembly so the trap's horizontal run remains level. Avoid forcing an angled connection, which can place stress on the washers.
Install the AAV in the tee outlet. Mount the Dual-Seal 20 AAV in the tee outlet according to the product instructions. Keep it accessible for inspection and above the trap arm, with adequate clearance for future service. Review the official installation guidelines and the applicable AAV code compliance requirements before finalizing the location.
Tighten the slip joints. Thread each nut carefully and hand-tighten it first. Then use pliers for approximately one additional quarter turn. Slip-joint washers seal through proper seating, avoid overtightening.
Test the completed assembly. Turn on and run water into the sink and inspect every joint, including the tailpiece, trap bend, tee, and wall connection. Check again after the cabinet area is dry. If a joint leaks, stop the water, reseat the washer, and retighten.
Bathroom Sink Trap Installation Tips
Keep the trap level and aligned with the wall stub-out. A clean, supported layout reduces strain on the slip joints.
Do not overtighten the nuts. Hand-tightening followed by a quarter turn with pliers is the practical starting point.
Verify that the AAV remains accessible and is installed above the trap arm. Local requirements may vary, so confirm placement before closing the cabinet.
Complete Trap Assembly Kit Installation Under a Kitchen Sink
Kitchen sink plumbing often leaves little room to work. Dual-bowl drains, a dishwasher hose, cleaning supplies, and a cabinet back can turn a routine trap replacement into a difficult reassembly. A pre-assembled trap and AAV tee reduce the number of loose connections while giving you a practical layout for tight under-sink cabinets. The flexible connector also helps adapt the assembly to the existing wall stub-out without forcing the drain into alignment.
For a dual-bowl sink, confirm which bowl shares the drain connection and identify where the dishwasher line enters the tailpiece or drain assembly. Keep the hose route high inside the cabinet before it drops to the connection point. This reduces unnecessary slack and keeps the line clear of the trap. If the existing configuration has an unusual branch or damaged wall connection, pause and verify the layout before installing replacement parts.
The kit includes a pre-assembled tubular tee and P-trap, conversion and slip-joint washers, nuts, and a flexible connector with two stainless steel clamps. That connector is useful when the kitchen drain uses the smaller dishwasher-side connection or when cabinet geometry makes rigid alignment difficult. Hand-tighten slip joints first, then check the fit before using a wrench sparingly.
Disconnect the dishwasher drain line if it shares the tailpiece, and place a container beneath the trap.
Remove the old trap and clean the exposed drain connections and wall stub-out.
Fit the flexible connector to the wall stub-out, securing it with the supplied stainless steel clamp.
Attach the pre-assembled trap and AAV tee, using the appropriate supplied washer and nut at each slip-joint connection.
Reconnect the dishwasher line, run both sink bowls, and test every joint for leaks.
Kitchen Sink Trap Installation Tips
Preserve access: Position the AAV tee where it remains accessible for inspection and does not press against the cabinet wall.
Check both bowls: Run each basin separately, then drain them together to confirm the shared assembly stays stable and leak-free.
Investigate odors: If a kitchen drain smells after installation, review identifying kitchen drain odors before assuming the trap needs replacement.
The pre-assembled design lets you swap a kitchen trap without disassembling the whole drain, which is especially valuable when cabinet access is limited. The AAV opens as the fixture drains to admit air and closes to block sewer gas. For more detail, review how Tuuber's dual-seal technology works before finalizing the installation.
How the Dual-Seal AAV in the Trap Assembly Prevents Sewer Gas at the Source
A complete trap assembly kit installation does more than connect a sink to the drain. It places the trap and air admittance valve in one coordinated assembly, so air-management protection stays close to the fixture instead of being treated as an afterthought. In a tight under-sink cabinet, that direct arrangement can simplify both installation and inspection.
Why Two Seals Matter
Tuuber's patented Dual-Seal 20 design uses an upper seal and a lower seal with three flow passages. Under normal conditions, both seals remain closed to help lock out sewer gases and odors from the drainage system. This is the first line of defense at the fixture, where an improperly protected trap can allow unpleasant gases to enter the room.
When the fixture drains, the valve responds to negative pressure inside the drainage system. It opens to admit air from the building into the DWV system, balancing pressure and helping protect the trap seal against siphonage. Once the pressure normalizes, the valve closes again, and the dual-seal design helps it hold that barrier even when pressure conditions in the system shift. See how a dual seal air admittance valve helps prevent sewer gas for a closer look at the operating principle.
Protection Built Into the Trap Assembly
Because the AAV installs in the tee of the trap assembly, the air-admission point sits directly at the individual fixture. That positioning helps the valve respond where pressure changes begin, while the pre-assembled configuration reduces the number of separate components that must be aligned under the sink. It is a practical approach for bathroom and kitchen applications using 1-1/2-inch venting.
Tuuber trap assembly kits comply with ASSE 1050 and ASSE 1051 standards. Always confirm the applicable local requirements before installation, since authorities having jurisdiction may impose additional rules for AAV placement and use. The AAV code compliance guide provides a useful planning reference for the work.
Frequently Asked Questions
How do you install a P-trap assembly?
Connect the sink tailpiece to the pre-assembled trap, attach the wall tube to the drain stub, and tighten each slip-joint connection by hand before checking for leaks. Keep the trap aligned without forcing the fittings. Follow the manufacturer's official installation guidelines for the specific configuration.
Can I install an AAV under a sink?
Yes. An air admittance valve can vent an individual fixture trap where traditional vent piping is not available, including many bathroom and kitchen under-sink applications. Confirm that the proposed location and installation comply with applicable local plumbing requirements before proceeding.
What is the benefit of a Tuuber Dual-Seal AAV?
Tuuber's patented design uses an upper seal and a lower seal to help block sewer gases and odors. Its triple-flow-passage design admits air when the fixture drains, helping protect the trap seal from siphoning, then closes to block gas when the drain is idle. See how Tuuber's dual-seal technology works for more detail.
Do I need a complete trap assembly kit for a new sink installation?
Not always. A kit is useful when you want a pre-assembled 1-1/2-inch trap and AAV with the matching connectors, washers, nuts, and flexible connector included. It is especially practical in tight under-sink spaces. Separate components may be appropriate when the drain layout, pipe size, or local requirements call for a different configuration.
How long does it take to install an AAV trap assembly?
Tuuber designs the Complete Trap Assembly Kit for a typical under-sink installation in under 30 minutes. Actual time depends on the existing drain condition, access, required adjustments, and whether the old trap must be removed or the wall tube must be measured and cut.
Ready to Install Your Complete Trap Assembly Kit?
Once you have confirmed the fit and reviewed the installation guidance, the Tuuber Complete Trap Assembly Kit can help you move forward with a focused under-sink setup.